Category Setup Tutorial For Easy Blogs Software
Category setup for EasyBlogs is a must in my opinion. Categories can add a third dimension to your blog.Consider this -- you get to add another content keyword focused page(s) on your website that automatically creates links to your blog entries.
Here's how it works. When you add an entry to your blog page, Easy blogs automatically creates a unique link to the entry in it's database. These links are then used to locate the entries from other pages.
For instance the blog page, Article index, category index and archive index are all updated automatically.
EasyBlogs Software And Tutorial
 Step by step instructions to create up to 100 blog/websites. Includes 326 page ebook.
AKA SBI RSS Tutorial
Only
Customer Service - No matter what time of day I'm here for you. Unlike other design firms I work all the time, days, nights, weekends and holidays. I'm just a phone call or email away. Get free advice for 30 days forever. Learn more...
If someone selects an article link from your category page they are taken right to it. No need for you to code your own links. Since your blog page is archived regularly and you don't want to lose your entries you can add it to a category for permanent storage. Just follow this tutorial to see how it's done.
Easy Blogs gives you the capability of using categories to organize your blog entries and articles, if you so choose. If you are thinking about bypassing the feature....no need to read this article, Why Using Categories Is A VERY Good Idea For Your Website Ranking! (in SBI Rss Tutorial) to see why.
Please know that the templates DO NOT include the necessary codes that will display your categories in the navigation menu. This is because there was no way to code the templates universally for both those who use categories and those who don't and have the menu look right for everyone.
So, you will need to hand code your template using this tutorial, "How To Set Up Categories Links In Your Template Navigation Menu." before you set up categories in your blog.
How To Set Up A Category In Your Easy Blog
Step 1. Go To Options on the left navigation menu.
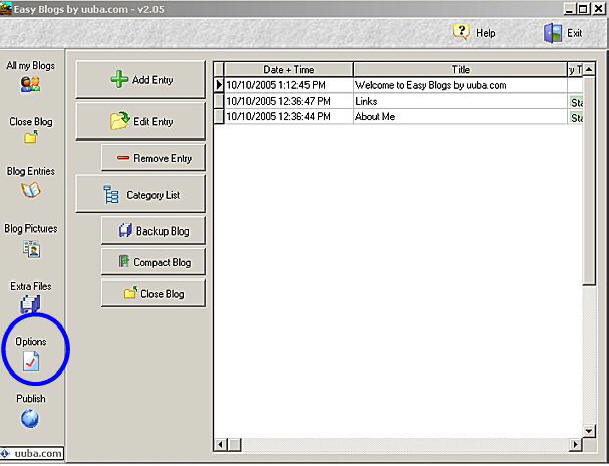
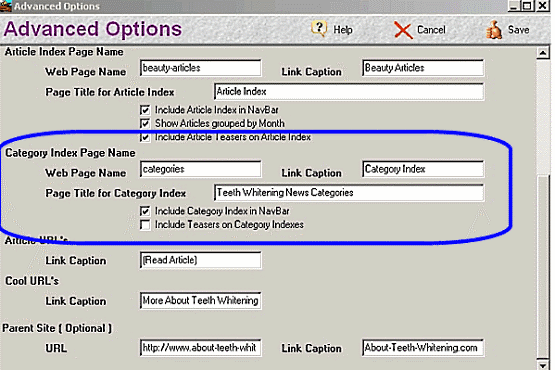
Step 2. Go Basic Options.
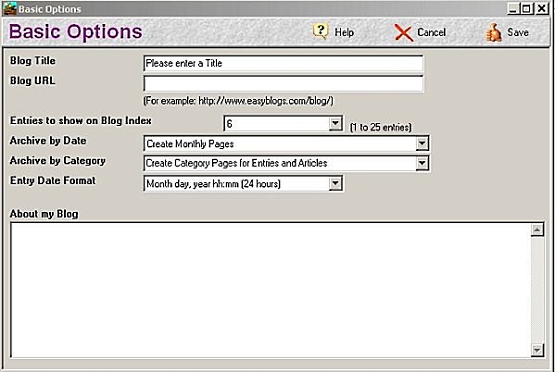
Step 3. Find "Archive by Category." Select whichever option fits how you have designed your blog. If you are only blogging entries, then you can select, "Create Category Pages for Entries Only ". If you are blogging both entries and articles, then select, "Create Category Pages for Entries and Articles"
Or, if you just want to build a submenu for articles that you use Easy Blogs to create, then choose "Create Category Pages for Articles Only "
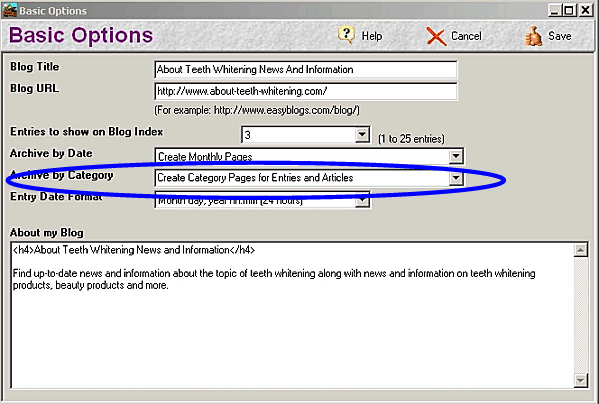
Step 4. Click Save ![]() in the upper right hand corner to save your changes
in the upper right hand corner to save your changes
Step 5. Now, go to Advanced Options.
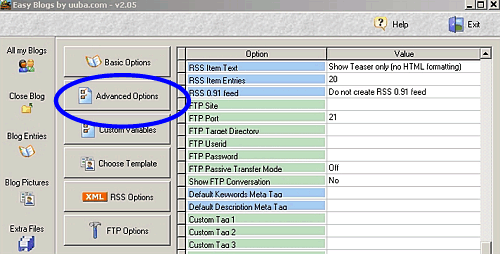
Step 6. Here, you will fill out the categories information as follows:
"Web Page Name" is your file or page name. Remember, NO SPACES
"Link Caption" will be the text in your link to your categories index page.
"Page Title for Category Index" is the Headline that will be displayed on your category page.
Check "Include Category Index In Nav Bar" since it will be referenced in the top menu of you blog pages.

Leave "Include Teasers" unchecked if you don't want to use them in your nav menu. If you do want to use them check this box, it will add a description on the categories page. It also adds the description to the nav menu if you list individual categories in your nav menu.
EasyBlogs Software And Tutorial
 Step by step instructions to create up to 100 blog/websites. Includes 326 page ebook.
AKA SBI RSS Tutorial
Only
Customer Service - No matter what time of day I'm here for you. Unlike other design firms I work all the time, days, nights, weekends and holidays. I'm just a phone call or email away. Get free advice for 30 days forever. Learn more...
Step 7. Click Save![]() in the upper
right hand corner to save your changes
in the upper
right hand corner to save your changes
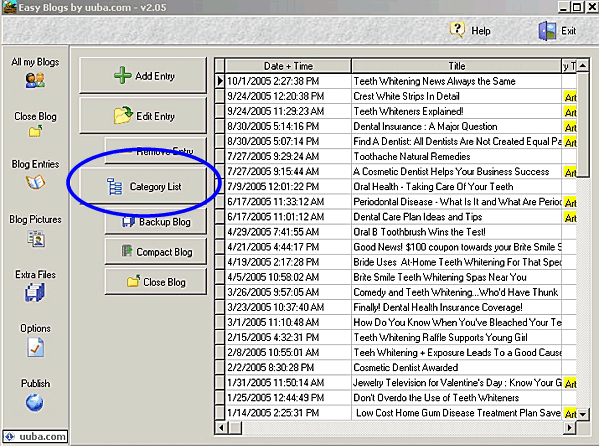
Step 8. Now, go to Blog Entries on the left menu bar.

Step 9. Click on the "Category List" button.
Step 10. Click on "Add Category."
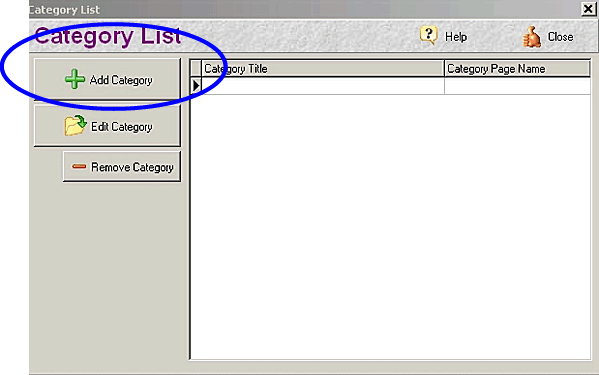
Step 11. Type the Title of your category. This is what will be displayed in the link to your this categories page in your navigation menu on your blog pages.
In the "Entry" box type a paragraph or more that describes what this category is about. This information will be displayed at the top of your "Category Index" page. Be sure to use your primary and secondary keywords for which you are optimizing this page.
Also, notice the name of the file circled in red below.
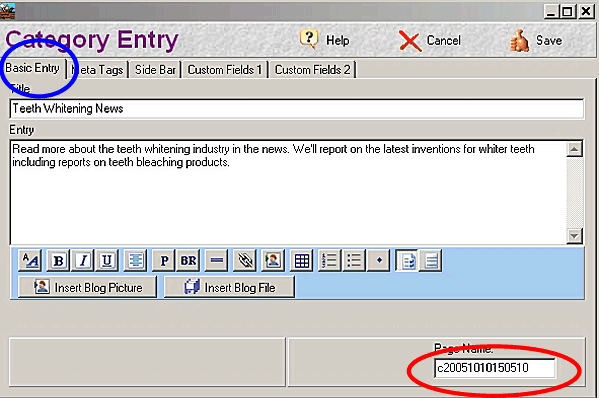
The software assigns a number to this file. I STRONGLY suggest that you change this to a keyword rich file name. You DO NOT need to add the word 'category' to the file name. This page will get indexed in the search engines so optimizing it well is a must.
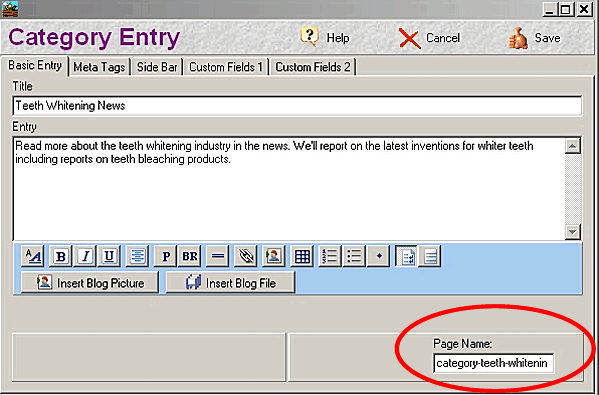
Step 12. Now, be sure click on the meta Tags tab at the top to fill in the keywords and description for your category page. This software functions much like SBI's page builder! You just fill in the blanks with keywords and description to optimize each category page that you create.
NOTE: I suggest filling in the "Article Teaser" blank, for blog templates that have the navigation at the bottom of the page (this includes all Look and Feel Templates). The "Article Teaser" will put a description of this page on your navigation menu that will not look right in this menu. Note: this can be manipulated... more on this later.
If you are using a template that does not match your SBI Look and Feel Template and the link in your navigation menu is for the index page of your categories, then you would want to use the "Article Teaser" to put a description for each category on your category index page.
Here's an example page:
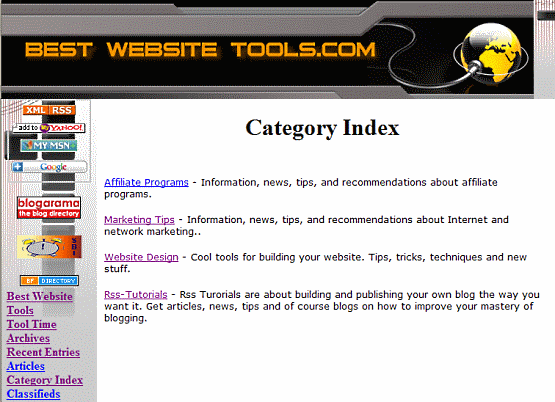
This page is a 'category index' page and the teasers are the descriptions that you see on this page for each of the categories. Notice on the left menu, that this page is listed in the menu system as, "Category Index."
So, again, if you are going to list each of your categories in your menu system, then don't use the Teaser. If you are going to use the "category index" in your menu system, then use the Teaser box to add content around your categories links.
Step 13. Click Save ![]() in the top menu bar to save your insertions.
in the top menu bar to save your insertions.
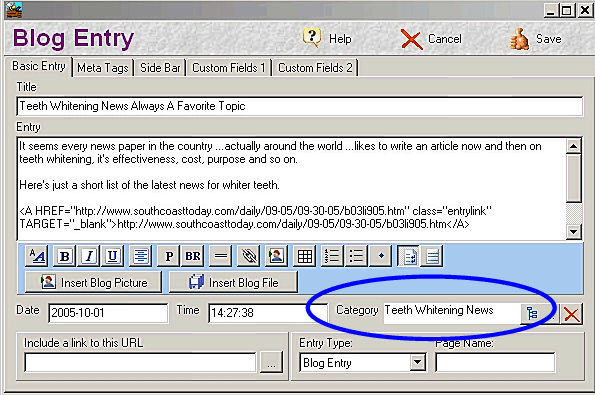
Step 14. Now, you can assign a category to a blog entry either when creating a new entry or you can go back and edit entries.
Note: If you go back and edit entries to assign to your categories, you will need a.) re-Publish your blog and b.) RE-UPLOAD all of your pages sitting in the Easy Blogs folder to your SBI website. Use Quick Re-upload It for this.
Step 15.***IMPORTANT***
You will need to Upload and Build ALL of your categories pages for the first time including the category index page.
After that, they will need to be re-uploaded whenever you add a new entry to your blog.
So, now, instead of the standard 4 pages to re-upload, there will be at least 4+ with your categories pages. I have updated the tutorial, "Getting Familiar With The Pages That Are Generated by EasyBlogs." with more information for category users.
Be sure that you have put the category pages into your blog navigation menu using the tutorial, How To Set Up Categories Links In Your Template Navigation Menu.
EasyBlogs Software And Tutorial
 Step by step instructions to create up to 100 blog/websites. Includes 326 page ebook.
AKA SBI RSS Tutorial
Only
Customer Service - No matter what time of day I'm here for you. Unlike other design firms I work all the time, days, nights, weekends and holidays. I'm just a phone call or email away. Get free advice for 30 days forever. Learn more...
Home : Easy Blogs Tutorials : category
61 W. Annabelle Ave. Hazel Park,
MI. 48030-1103, U.S.A.
telephone: (248)546-0374
email: support@best-website-tools.com
© Copyright 2007-2025 All rights Reserved.
Sun: closed
Mon-Fri: 9:00AM to 6:00PM
Sat: 9AM-12:00PM
Closed Holidays
