How to select the proper frames per second in your video camera

One fundamental principle every video creator must know is that fps impacts the motion aesthetics of the video, as well as in the color grading process. The frames per second chosen can affect the color depth and detail of the footage, when color grading in Davinci Resolve Studio.
Let's start by understanding the three most commonly used fps settings: 24, 30, and 60 fps. Each has its benefits and drawbacks that can significantly affect your output as a video artist. We will also explore 29.97 fps and what it is for.
Most Common Frames Per Second Settings
- 24 fps:
The pros are:
- It is considered as the standard for cinematic, film-like motion and hence adds a professional touch to your videos.
- Best for low light conditions as it allows for slower shutter speeds.
- Requires less storage space compared to higher fps.The cons are:
- It may look choppy when used for fast or sudden actions.
- It is not the ideal setting for sports, action videos or events with rapid movements.
.- It may look choppy when used for fast or sudden actions. - 29.97 fps:
The pros are:
- Reduces errors and interferences in TV broadcasts. Required for live transmission.
- Compatible with NTSC and HDMI color encoding system.
- Preferred by traditional broadcast television networks. (Not Cable or Internet)The cons are:
- Can cause a syncing issue with audio if not handled correctly. Important!
- Might not deliver the smoothest look for action-packed sequences.Because of delay in translation.
- Not as universally compatible with modern display technologies and online platforms. - 30 fps
The pros are:
- It provides a smoother motion, less cinematic, and more real-world like look.
- It is excellent for vlogging or photography with maximum movement and low comsumption.
- It is ideal for Cable and Internet publishing. The cons are:
- It requires more storage space than 24 fps.
- It could be less suitable for cinematic style videos due to its real-time look. - 60 fps:
The pros are:
- It delivers ultra-smooth footage, ideal for sports videos or any situation with rapid action.
- It's an excellent choice for slow-motion editing as you can slow down the footage without losing quality.The cons are:
- It requires substantial storage space.
- Produces less motion blur, which might feel unnatural for certain types of videos.

If you are shooting a short film or a cinematic epic where you want to convey the proper look and feel, 24 fps would be ideal due to its slightly choppy motion that is synonymous with the movie industry. But the camera settings need careful attention to avoid overexposure and excessive motion blur.
In the case of corporate videos, tutorials or interviews where the action is minimal and you want a clean, smooth footage, then 30 frames per second is your best bet. It gives an authentic, as-seen-in-real-life perception to your audience.
If you are a YouTube creator into the realm of sports videos, action vlogs, or just want some slow-motion footage, then 60 fps will serve your purpose. It captures the action in fine detail and allows for crystal clear slow-motion in the final video cut. Slow motion is achieved by shooting at a faster frame rate then it is played back at.
Now that we understand how the frames per second numbers play a key role in video shooting, let's dive into how they connect with color grading in Davinci Resolve Studio.
Color Grading In DaVinci Resolve Studio

Each frames per second setting presents unique challenges and opportunities for a video creator. In general, lower frame rates typically capture more light, thus offering better color depth and richness.Higher resolution per frame but also increased motion blur.
If you're using 24 fps, you will generally have a bit more room to play with the colors since each frame has more information. However, this richness also means you will need a careful eye when color correcting to avoid overpowering results. In some cases scene matching could be more difficult to achieve and take more time to do.
With 30 fps there is a balance between the cinematic 24 fps and the ultra-smooth 60 fps. Here, color grading becomes a little bit easier as the footage tends to be less dynamic. Think news anchors or home movies. Because there is more consistancy from frame to frame. Making color correction a little faster and smoother. However, precision is still the key. Overdoing it could result in an unnatural look and feel.
60 frames per second allows video colorists to bring out the rich colors and details within the fotage. However, each frame has less time for exposure, leading to potential issues with color quality in low light conditions. Therefore, a good grasp of lighting, contrast, and color balance is recommended.

An essential trick in video creation is matching the fps, with the correct shutter speed. This affects the sharpness and motion blur in your image, directly impacting the perceived color and detail of the video footage.
The frames per second number isn't a magic solution by itself. It is understanding the nuances and subtleties associated with each fps, and how to use them in the camera and the color grading process, that could truly set your work apart from the crowd.
Cinematic Tips for Videographers And Colorists

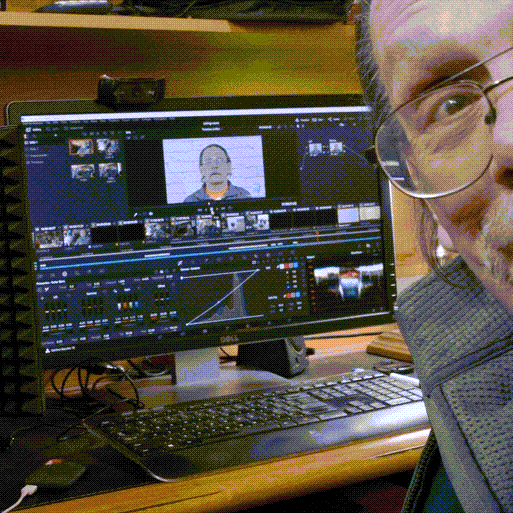
1.) Viewer Screen. 2.) Color Wheels 3. Custom Curves. 4.) Electronic Scopes.
Attention to detail and an understanding of your project requirements and color grading aspects can go a long way to getting that perfect shot. Editing vlogs or corporate visuals require a different skill set than creating a vibrant, action-packed sports video. Remember that the faster the fps, the larger the file size will be.
Selecting the right frames per second and comprehending it's variations can make you a good videographer, and also an effective video colorist. It could enable you to manipulate the video footage in the most effective way using DaVinci Resolve Studio.
There is so much more to the fps settings than simply deciding the scene's look. Color grading is an essential part of this process of achieving the desired result.
While shooting video, always consider how your footage will be color graded. Your camera settings should complement this process, helping you to make the necessary corrections or adjustments while color grading.
The key is not to be afraid to experiment with different fps settings across various scenarios. Experience is what allows you to truly understand and get a feel for the consequences of each frames per second choice.
Adaptation is crucial. As the saying goes - "The best camera setting is the one that is right for your project." This could not be more true, especially when treferring to frames per second and the impact on color grading.
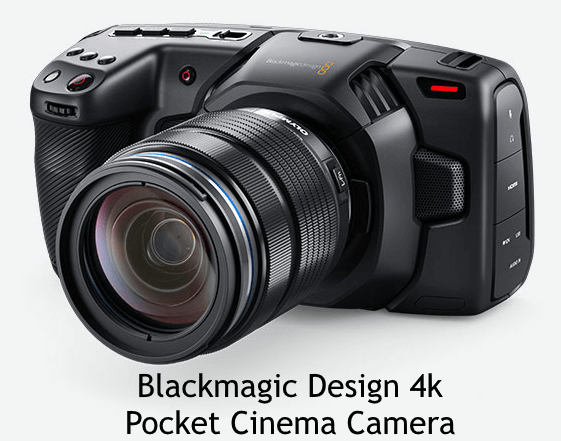
The BlackMagic Design Pocket Cinema Camera 4k is a formidable tool for aspiring and professional videographers alike. Understanding the frames per second settings on your camera can significantly improve the quality of your video creations. It also allows you to maximize your creativity and improve the quality of your videos.
Whether you're making videos for YouTube, FaceBook, Vimeo or another platform, the right frames per second setting and your knowledge of color grading can open up a world of posibilities. The power is within your grasp; all you need to do is practice, practice practice.
Frames Per Second Conclusion
To wrap up, your frames per second settings are critical not only for capturing the perfect shot, but also shaping the color grading process. Mastering this as a video colorist can significantly improve your craft, adding another vibrant feather in your videography hat.
By: Tim Koen (Master of BWT)
Home : Video Creation Tips Category : frames per second
61 W. Annabelle Ave. Hazel Park,
MI. 48030-1103, U.S.A.
telephone: (248)546-0374
email: support@best-website-tools.com
© Copyright 2007-2026 All rights Reserved.
Sun: closed
Mon-Fri: 9:00AM to 6:00PM
Sat: 9AM-12:00PM
Closed Holidays
